


OpenID Connect with Microsoft Entra ID (SimpleHelp Single Sign-On)
SimpleHelp supports single sign-on (SSO) using OpenID Connect with Microsoft Entra ID (formerly Azure Active Directory / Azure AD). To enable technicians to authenticate using Entra ID, an administrator must create an App Registration in the Microsoft Entra admin center (or Azure portal) and enter the application details into SimpleHelp.
Overview
This document will guide you through completing the following steps:
- Create and configure an App Registration
- Create an application credential (client secret)
- Copy the required values into SimpleHelp (Client ID, Tenant ID, Credential)
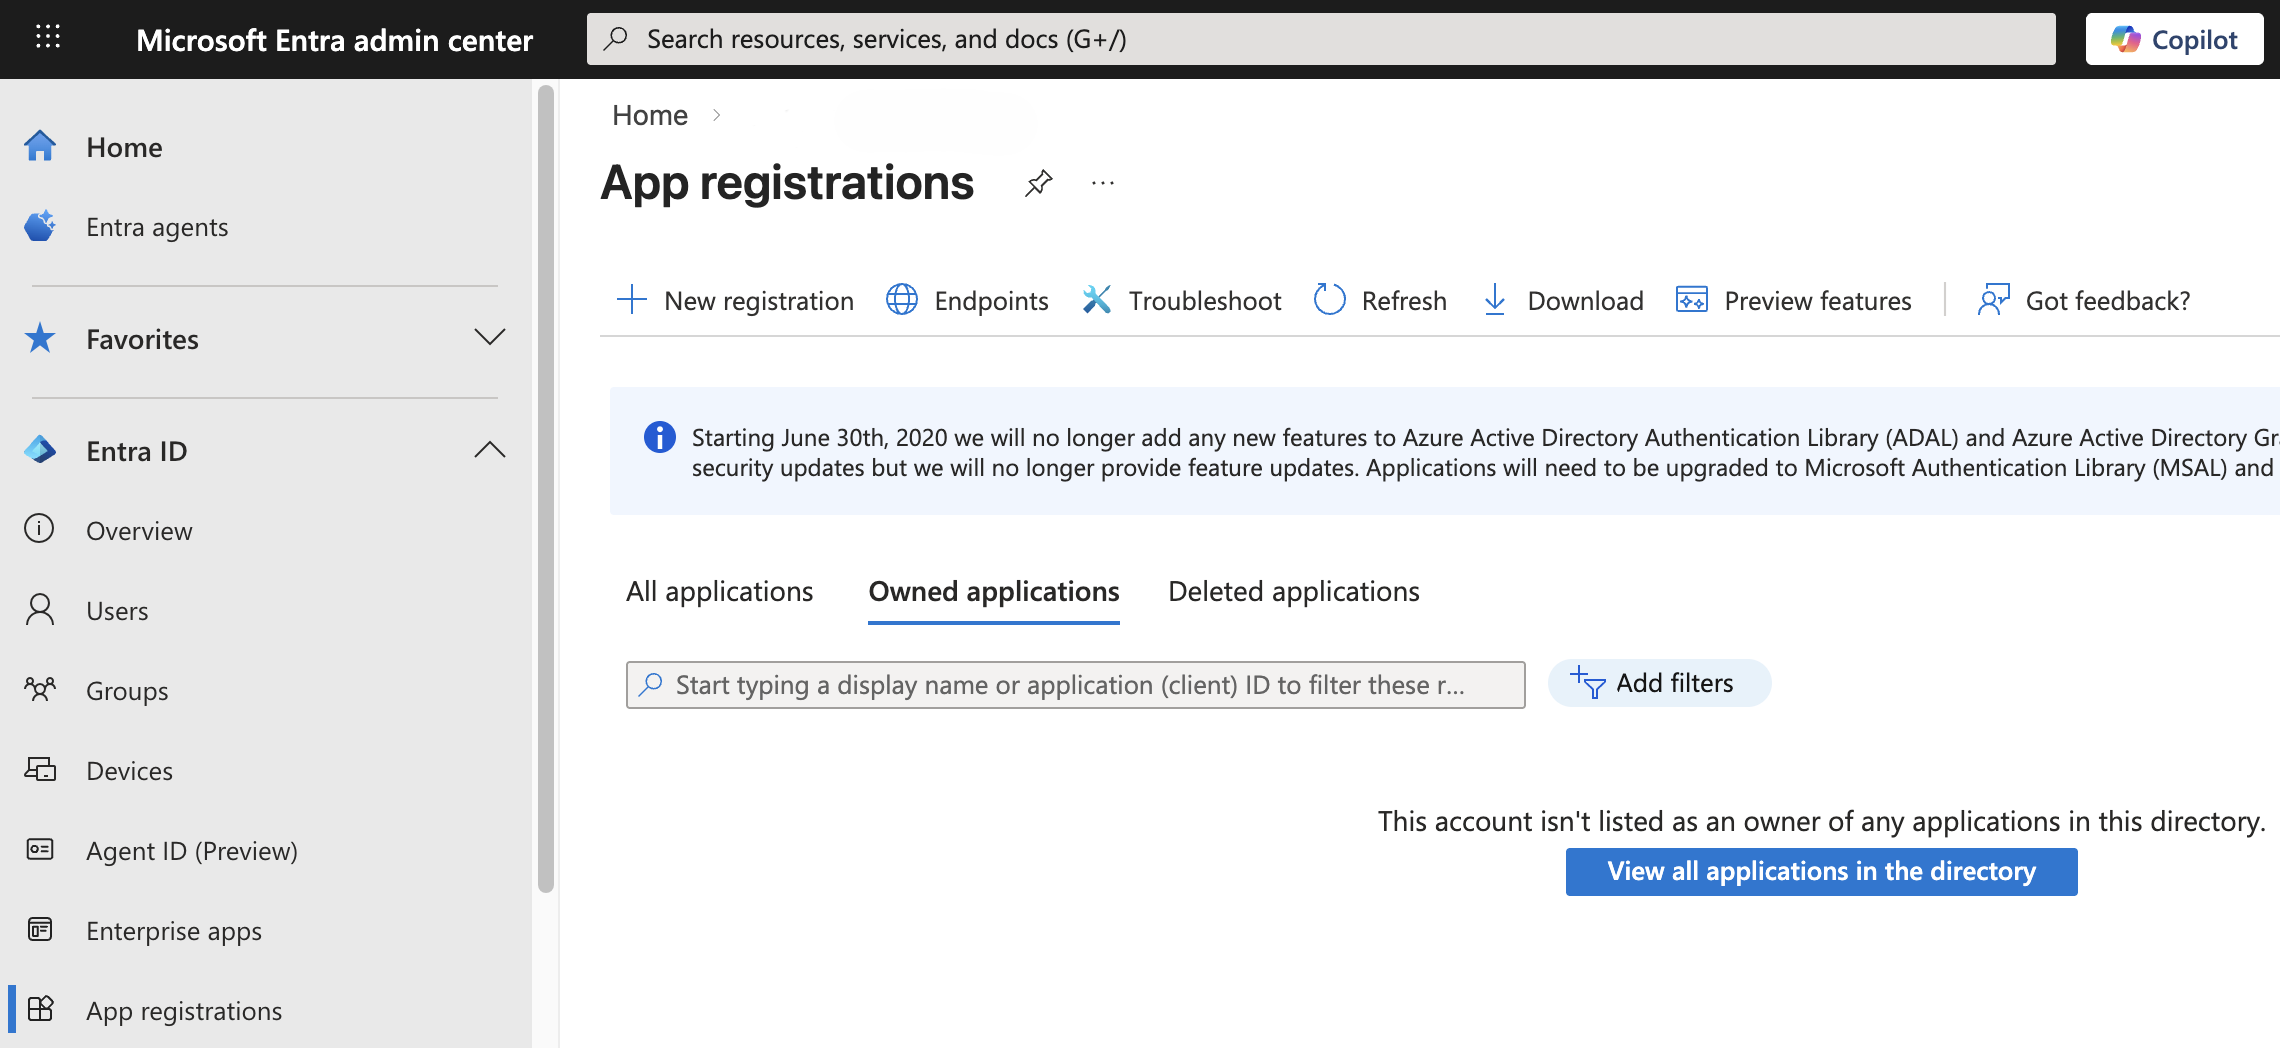
1) Create the App Registration
- Select New registration to create a new App Registration.
- Enter a Name for the application, for example:
SimpleHelp Integration. - Under Supported account types, choose the option that best matches your login requirements.
- If unsure, select Accounts in this organizational directory only (Single tenant).
- Under Redirect URI, select Web and paste the redirect URI provided by SimpleHelp (ending in
.../oidc).
- This can be found in the SimpleHelp Technician Console when configuring Authentication Services under the Azure App Settings.

- This can be found in the SimpleHelp Technician Console when configuring Authentication Services under the Azure App Settings.
- Select Register (or Create) to complete the registration.
A summary for your new App Registration is presented in the figure below.
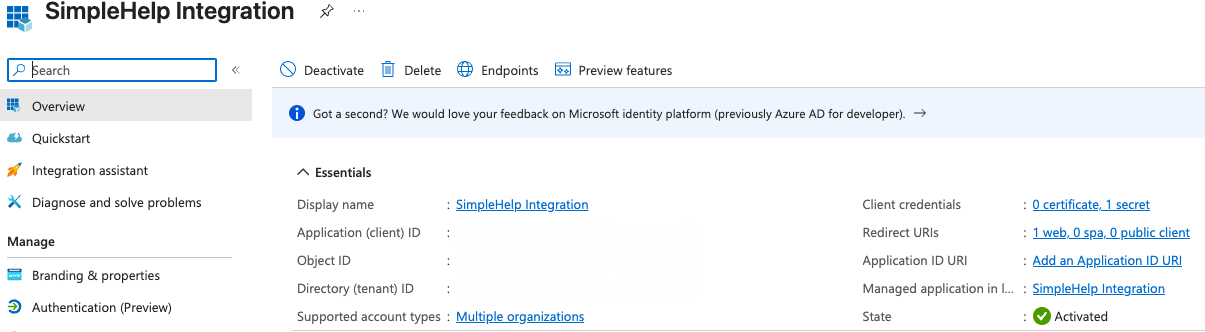
Record these values
You will need the following values to input in the SimpleHelp Technician Console:
- Application (client) ID
- Directory (tenant) ID
2) Configure Authentication and Tokens
- In App registrations, click Authentication (Preview) in the menu to the left.
- Select the Settings tab (next to Redirect URI configuration).
- Under Implicit grant and hybrid flows, check both:
- Access tokens
- ID tokens
- Click Save.
Add Group Claims (optional)
If you want SimpleHelp to receive group membership information in tokens (role/group mapping), configure group claims:
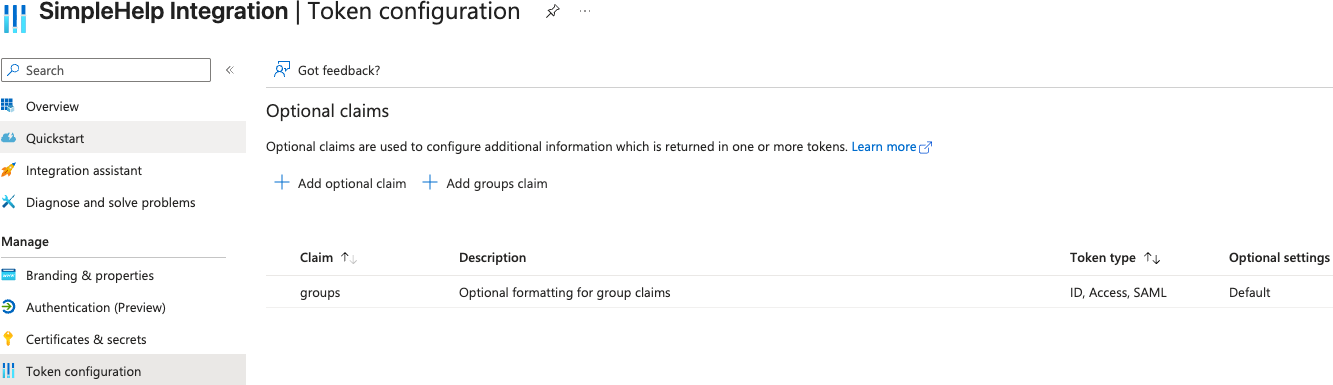
- In the left menu, select Token configuration.
- Select Add group claims (next to Add optional claim).
- Choose which group types to return.
- If you only want groups assigned to the app, select Groups assigned to the application.
- Select Add at the bottom to save the claim.
A summary of your new Token Configuration is presented.
Note: For advanced configuration of group claims and roles, please consult Microsoft’s official documentation and guidance.
API Permissions (OpenID scopes)
In most environments, the minimum delegated permissions for basic sign-in is User.Read. This permission is considered least privileged and allows the application to read basic profile information of the signed-in user (display name, user ID, email address). We will use User.Read as the baseline for the application which only needs to authenticate and read the user profile.
- In the left menu, select API permissions.
- Select Add a permission.
- Select Microsoft Graph.
- Select Delegated permissions.
- Search for
openid.0 - Select openid and Add permission.
- Select Grant admin consent to apply the permissions.
Note: By default, your tenant may already include User.Read on new app registrations. Only grant additional permissions if you have a clear requirement.
3) Application Credentials (Client Secret or Certificate)
To create a client secret in the App Registration:
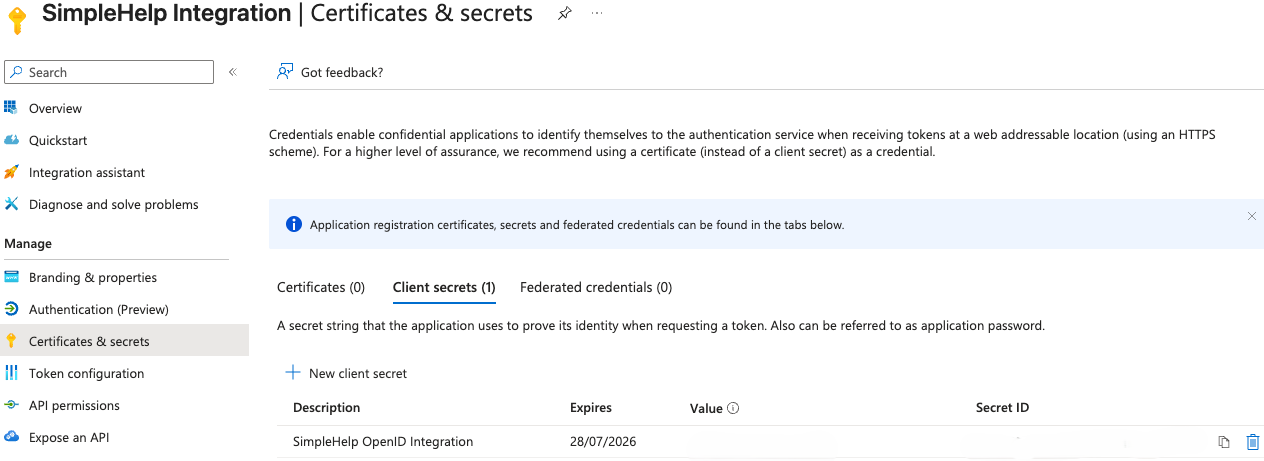
- Go to Certificates & secrets (left menu).
- Under Client secrets, select New client secret.
Note: The client secret description should be clear and descriptive to identify its purpose. For expiration, security best practices strongly advise against long-lived secrets. Microsoft experts often recommend shorter expiration periods such as 3–6 months to reduce the risk of credential exposure.
Create a client secret
- Select New client secret.
- Enter a description and choose an expiration duration.
- Press Add at the bottom of the window to generate the new client secret.
- Copy the Value immediately and store it securely — you cannot retrieve the value later.
Security best practice: Store secrets in a secure vault (e.g., Azure Key Vault or an equivalent secret manager). Avoid storing secrets in emails, tickets, or shared documents.
The new client secret will appear in the summary.
4) Final Steps in SimpleHelp
In SimpleHelp, create or edit the Microsoft Entra ID / Azure option under Authentication Services, then enter:
- Client ID (Application ID)
- Tenant ID (Directory ID)
- Client Secret value
When a technician selects this login option, they will be redirected to Microsoft Entra ID to sign in. After successful authentication, Entra ID redirects the user back to the SimpleHelp server via the configured redirect URI.